Pages

Showing posts with label The All Natural Face. Show all posts

Thursday, March 31, 2011

EOTD: Bright! (Sugarpill with Madd Style Cosmetics)

Today the warm weather got me all excited to do a bright eye. (Not that I don't usually do a bright eye, but still!) I primarily used Sugarpill (both pressed and loose), but I also used one Madd Style Cosmetics pigment to achieve this look:

(Click the photo for a larger version.)

Products used:
  • The All Natural Face Shadow Primer in "Buff"
  • Sugarpill Cosmetics Buttercupcake on 1st half of lid
  • Sugarpill Cosmetics Magentric on outer lid and blended inwards toward Buttercupcake. Also blended up into crease.
  • Sugarpill Cosmetics Tipsy applied to lower lash line
  • Madd Style Cosmetics Tweaker in duct and as brow highlight
  • Gabriel Color Mascara in "Black"
Usually I put on a base (NXY Eyeshadow Base in "White" is my go-to), but today I decided not to in order to better test out the All Natural Face primer and to see how well my makeup would stay without a base affecting the process. The results were quite good. I took these pictures over 8 hours after applying, though I did do a quick touch up before snapping the photo. The creasing was minimal, which is great! What was the best, however, was that my Sugarpill colours were bright as all hell even without the white base!! Win!!

Tuesday, March 1, 2011

Madd Style Cosmetics: Princess Buttahcup finds Hidden Tracks playing FF.

My wonderful friend gave me a neat tip when I questioned her about how she gets her crease colour faded out so nicely. And the tip uses something that is...wait for it...free! Cause we all have a few of them. Curious to know what I'm talking about? Then read on, you lovely people, you!

Your supplies:
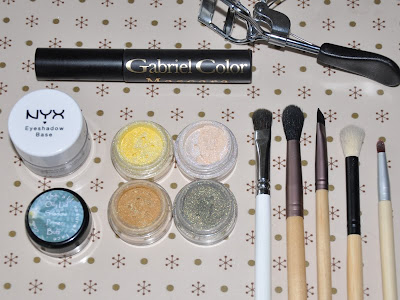
(NYX Eyeshadow Base in "White", The All Natural Face Primer in "Buff", your favorite mascara, Madd Style Cosmetics Pigments in: (t-l) Princess Buttahcup, (b-l) Hidden Track, (t-r) XRay Spex, (b-r) Final Fantasy, a small shader brush, a fluffy tapered brush, an angled brush, a fluffy fluffy brush and a small pencil brush.)

As always, begin with a clean face!
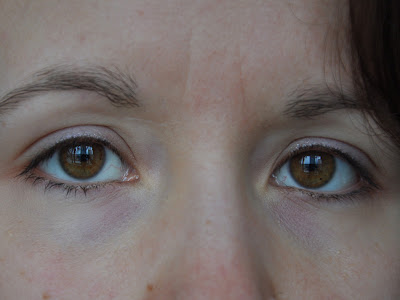

Then, as per usual, you want to prime your lids with your preferred primer. I chose my All Natural Face primer in "Buff". I rubbed my finger on the product and then transferred it to my eyelid.
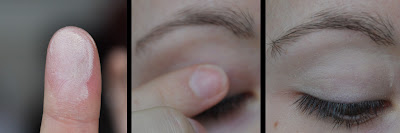

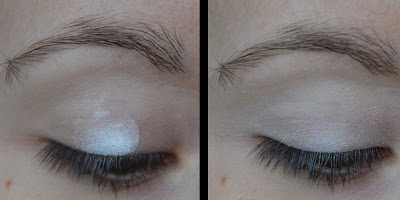
For this look, because I was using such light colours, I went with an all white base. Using my NYX Eyeshadow Base in "White", I applied it with my finger to the center of each lid and then blended it out to the whole lid and up towards my crease.

Then, using my new favorite OCC brush (the #008 small shader), I picked up some Princess Buttahcup on to the brush, swirled it around in the lid, and applied it to about 1/2 of my eyelid. Remember--pat these pigments on. Pat pat pat!
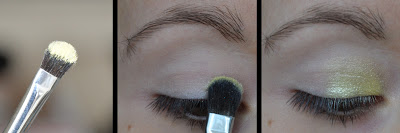

Then, using the same brush, I picked up some Hidden Track in the same way and applied it to the rest of my lid.
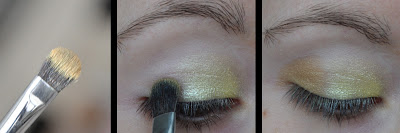

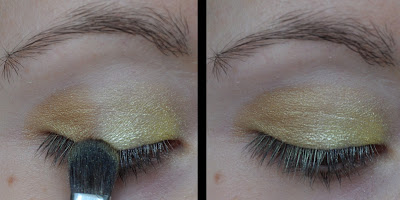
To blend Princess Buttahcup with Hidden Track, I grabbed a bit more Hidden Track on my brush and patted it right on the line that divided the two colours. I also patted from the Princess Buttahup colour over to Hidden Track, and vice versa. This achieves a nicely blended lid.


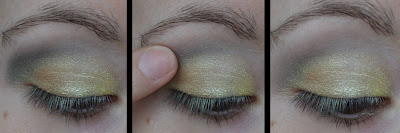
Next, I took some Final Fantasy on a fluffy crease brush. I tried to just take a little bit, but ended up with a bit more than I had planned. Don't worry though, it all turns out okay in the end!! Starting at the outside corner of my eye, up above where I applied Hidden Track, I placed my brush and with a sweeping motion went up into the crease towards the inner part of my crease.
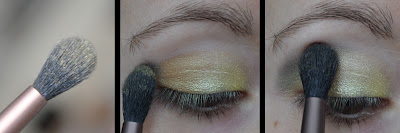

Now comes the "trick"! See how Final Fantasy (on the left picture) appears quite dark? Well, the magic ingredient to this look is--yep, you got it, your finger!! Using my finger, I lightly blended out the line from Final Fantasy to my brow and also lightened up the Final Fantasy a bit on the outside corner. And as you can see on the right, it leaves a very subtle (and very nicely blended) crease colour.

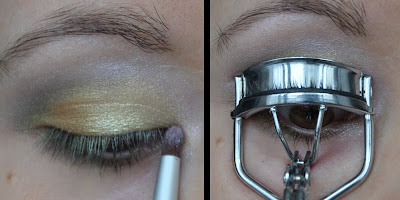
To do my lower lash line, I took an angled brush and dipped it into Final Fantasy. I pressed the pigment into the brush using the inside of the lid, and then applied it to about 1/2 of my lower lash line.


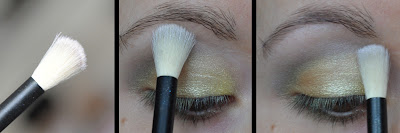
To do your brow highlight, take some XRay Spex on a very fluffy brush and sweep it along your brow bone. I like to bring that highlight colour down towards the inside of my eye (as you can see on the right) to help brighten things up a bit.

For my duct, I used XRay Spex again but applied it more heavily than I could with that fluffy brush by using a small...pencil type brush (I think you could call it that?). Then I decided to actually curl my lashes (the picture makes me giggle), which I don't do often (enough).

Apply some mascara...And that is all it takes to achieve this:
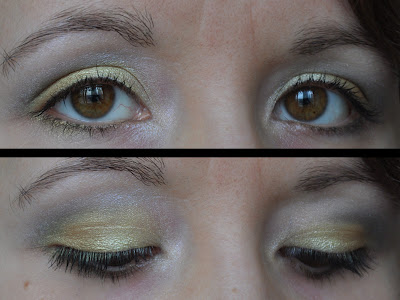
(No Flash)
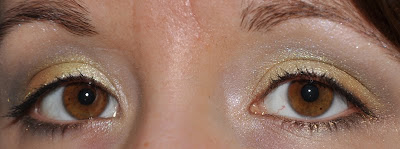
(Avec Flash)

I think I am going to become a HUGE fan of this finger blending technique. I really like how it softens up the crease so much, but doesn't make the colour disappear either. What do you think? :)

If you like the looks of the pigments you have seen used in this tutorial (which, of course you should, because they are freakin' awesome), then check out Madd Style Cosmetic's Etsy shop. And head on over to the FB Fanpage to say hi!

Friday, February 4, 2011

New brushes and new mail.

I super duper like to get new brushes. It may be one of my favorite things. Do I need new brushes? No, not exactly!! However, that doesn't stop me. My second most latest purchase (my most recent purchase probably won't make its way to my house for a couple more weeks) was unplanned--and thus I don't feel as guilty about it as I should. Also--the trip the to art supplies store was for another purpose entirely...and that makes it all okay (somehow). AND. Artist brushes are MUCH cheaper than brushes you'll get that are actually "make-up" brushes. So in the end, I WIN.

So. While going to the art store to pick up acrylic paints (my husband and I want to try messing around with them), I found a neato package of brushes that will totally be awesome for liner. And a fan brush--which is so small that it isn't really useful. But 5 out of 6 ain't bad (I think the pack cost $11.99)! The flat topped ones and the angled one are especially exciting to me because their ends are SO very thin. To the left of the pack is a single 000 sized teeny tiny brush (I think it cost...$2 something). I had been doing my eyeliner with a size 00 up to now. The 000 one is awwwwesome though.


I used the 000 to achieve the liner in this look (featuring Madd Style Cosmetics pigments, of course!):

(See how thin the liner is?!! Gah! Awesome. MSC colours used: Blister in the Sun on 2/3rds of the lid. Kick Ass in the outer 1/3rd and then blended into BitS to make that orange colour. The Up in Smoke matte Black was used as my liner. And I used a dab of Rocky (from the Rocky Horror Picture inspired collection) in my duct. Lastly, Xray Spex lightly dusted on as my brow highlight.)

So far I haven't had a chance to play with the brushes from the 6-pack. Hopefully I'll break at least one of them in on Sunday!!

Then, when arriving back home from the art store, I had mail too!! My package from The All Natural Face had arrived! I ordered their primers when I was anxiously awaiting my primer from SoBe--and after a friend recommended the ANF primer, I just had to find out what they were all about. The package contained:

(Liquid Eyeliner, Eyelid primer in "Buff" and in "Black," a business card and two samples)

The samples look neat.

(The one on the left is a "Face Food Fruit Facial Wash--Strawberries and Cream" made of strawberries and coconut milk. The one on the right is a "Softening Mud Mask." I rarely do much "fancy" stuff with my facial cleaning routine, but I'll try these out and see what I think!)

The primers were what I expected. The texture on them is nice enough, but I definitely experienced creasing after not too long when using them.


The pigmentation on the black one is especially nice. I used it as a base to this look:

(This is MSC in Jive Talk on the lid. Blended out with some Star Gazer and UiS White as the brow highlight. I also used some UiS Black in my water line overtop of UD 24/7 Glide Pencil in Zero. Putting the loose pigment over the pencil REALLY makes it stick. I mean, really really stick.)

For the picture taking and for about an hour, the lids looked good--but then the creasing set in and I was one sad vegan Canadian make-up obsessed girl.

So all in all, I am not too impressed with the primers I received from The All Natural Face. I am going to try using less and see what happens. Likewise, I was not very happy with the eyeliner. I tried to take a swatch picture:


(The lower smudged liner was just me testing out the staying power. The top line (right under the scar my sister gave me with a mechanical pencil back when we were younger and hated each other) is the product after two swipes. This colour is called "Black Pearl" but I don't find it to be nearly as pigmented as I want it to be/thought it would be. At least it didn't cost too much $.)

Thus concludes my new brushes and mail show-and-tell! I am hoping to work on my next pictutorial on Sunday--so if you're dying to see me try out a specific colour combo--let me know!! :)