Your supplies:
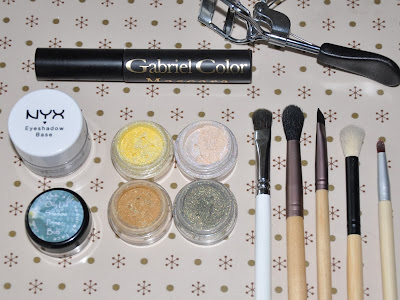 (NYX Eyeshadow Base in "White", The All Natural Face Primer in "Buff", your favorite mascara, Madd Style Cosmetics Pigments in: (t-l) Princess Buttahcup, (b-l) Hidden Track, (t-r) XRay Spex, (b-r) Final Fantasy, a small shader brush, a fluffy tapered brush, an angled brush, a fluffy fluffy brush and a small pencil brush.)
As always, begin with a clean face!
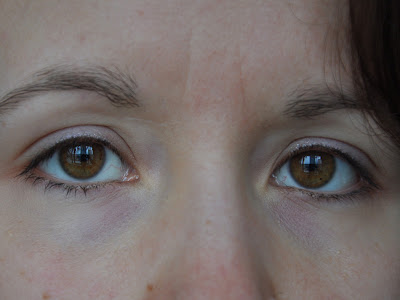
Then, as per usual, you want to prime your lids with your preferred primer. I chose my All Natural Face primer in "Buff". I rubbed my finger on the product and then transferred it to my eyelid.

For this look, because I was using such light colours, I went with an all white base. Using my NYX Eyeshadow Base in "White", I applied it with my finger to the center of each lid and then blended it out to the whole lid and up towards my crease.
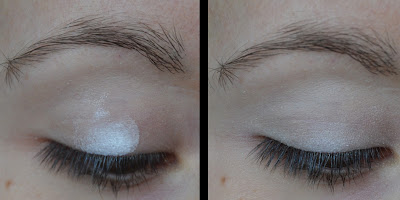
Then, using my new favorite OCC brush (the #008 small shader), I picked up some Princess Buttahcup on to the brush, swirled it around in the lid, and applied it to about 1/2 of my eyelid. Remember--pat these pigments on. Pat pat pat!

Then, using the same brush, I picked up some Hidden Track in the same way and applied it to the rest of my lid.

To blend Princess Buttahcup with Hidden Track, I grabbed a bit more Hidden Track on my brush and patted it right on the line that divided the two colours. I also patted from the Princess Buttahup colour over to Hidden Track, and vice versa. This achieves a nicely blended lid.
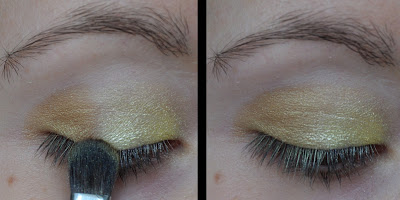
Next, I took some Final Fantasy on a fluffy crease brush. I tried to just take a little bit, but ended up with a bit more than I had planned. Don't worry though, it all turns out okay in the end!! Starting at the outside corner of my eye, up above where I applied Hidden Track, I placed my brush and with a sweeping motion went up into the crease towards the inner part of my crease.

Now comes the "trick"! See how Final Fantasy (on the left picture) appears quite dark? Well, the magic ingredient to this look is--yep, you got it, your finger!! Using my finger, I lightly blended out the line from Final Fantasy to my brow and also lightened up the Final Fantasy a bit on the outside corner. And as you can see on the right, it leaves a very subtle (and very nicely blended) crease colour.

To do my lower lash line, I took an angled brush and dipped it into Final Fantasy. I pressed the pigment into the brush using the inside of the lid, and then applied it to about 1/2 of my lower lash line.
To do your brow highlight, take some XRay Spex on a very fluffy brush and sweep it along your brow bone. I like to bring that highlight colour down towards the inside of my eye (as you can see on the right) to help brighten things up a bit.

For my duct, I used XRay Spex again but applied it more heavily than I could with that fluffy brush by using a small...pencil type brush (I think you could call it that?). Then I decided to actually curl my lashes (the picture makes me giggle), which I don't do often (enough).
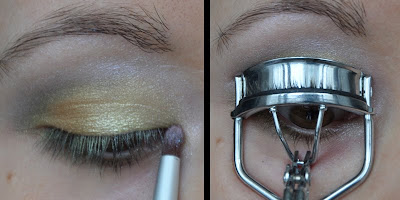
Apply some mascara...And that is all it takes to achieve this:
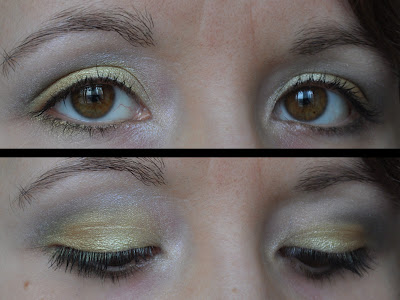 (No Flash)
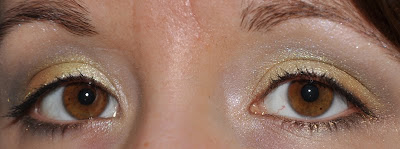 (Avec Flash)
I think I am going to become a HUGE fan of this finger blending technique. I really like how it softens up the crease so much, but doesn't make the colour disappear either. What do you think? :)
If you like the looks of the pigments you have seen used in this tutorial (which, of course you should, because they are freakin' awesome), then check out Madd Style Cosmetic's Etsy shop. And head on over to the FB Fanpage to say hi!
If you like the looks of the pigments you have seen used in this tutorial (which, of course you should, because they are freakin' awesome), then check out Madd Style Cosmetic's Etsy shop. And head on over to the FB Fanpage to say hi!
Love you, Danielle! I'm glad you like the technique! Thanks!
ReplyDeleteNo no no. Thank *you*, my dear! :)
ReplyDeleteI'll have to try out that technique! Awesome blog Danielle!
ReplyDeleteYes, try it, Tiffany!! And thank you. :)
ReplyDeleteRight ON!
ReplyDeleteThanks, Krissi!! :)
ReplyDelete